---
title: "Embed map with iFrame | Guides | Maps apis | Maps platform"
description: "Embed MapTiler maps in your website with an iFrame."
---
> For AI agents: a documentation index is available at [/llms.txt](https://docs-beta-4y5.pages.dev/llms.txt). Markdown versions of all pages are available by appending .md to any URL.
# Embed map with iFrame
An iFrame is the simplest way to show an interactive map on your website or blog, like this:
The map comes with basic controls to zoom and move around. You don’t need any coding skills, just a few lines of HTML that you put together from your map’s style ID and your API key. Prefer to have an AI assistant write the code for you? See [how to use MapTiler with AI](https://docs-beta-4y5.pages.dev/guides/developer/ai/how-to-use-with-ai/).
## Create the iFrame code
1. Open the map you want to use in your MapTiler account. It can be a ready-made map or your custom map.
2. Click **Share**. Under **Build an application**, copy the **style ID** and pick the **[API key](https://docs-beta-4y5.pages.dev/guides/credentials/api-key/)** you want to use for this map.
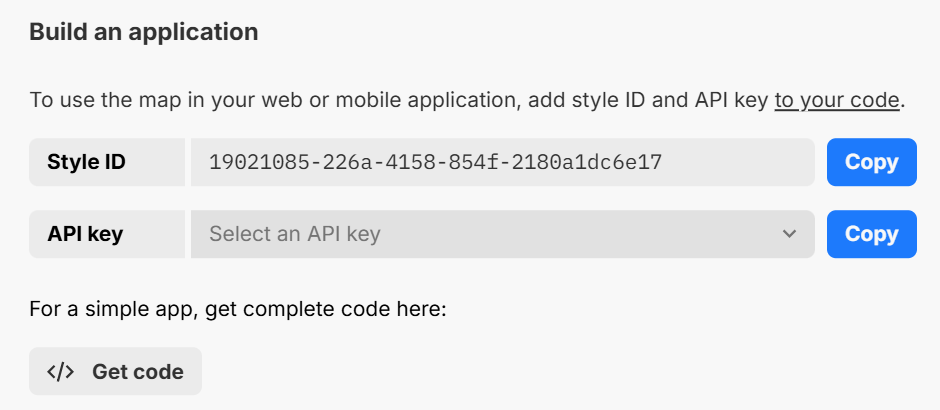
3. Copy this code and replace `YOUR_STYLE_ID_HERE` and `YOUR_MAPTILER_API_KEY` with your values:
```html
```
Keep the `allow="geolocation"` attribute. It lets your visitors use the map’s button that shows their location. Without it, the button is still present but disabled.
The map now opens with its default view and basic controls. To show a specific place, see [Customize the iFrame](#modify-and-move-the-map).
## Protect the API key
Before you publish the code, [protect your API key](https://docs-beta-4y5.pages.dev/guides/developer/credentials/api-key/) so that it only works on your website. The key is visible in the page source, so anyone could copy it and use it on their own site otherwise.
## Add the code to your website
Paste the code into your page’s HTML between the `` and `` tags, where you want the map to appear.
On a blogging platform or website builder, look for an option to edit HTML or add an HTML block, and paste the code there.
## Customize the iFrame
### Map size
Change the size of the map with the `width` and `height` attributes, or style the `
```

_Example of a tilted map view of Manhattan_
To find the values for your view, open your [link to map](https://docs-beta-4y5.pages.dev/guides/using-map/link/) in a browser and move the map to the place you want. The address bar then shows the current position hash, so you can copy it to your iFrame code.
### Map style
To show a different map, replace the style ID in the `src` URL with another map’s style ID.
If you want to configure the map controls, add markers or your own data, or build a full map application, see [Build a map application](https://docs-beta-4y5.pages.dev/guides/developer/#add-map).